Thursday, April 29, 2010

Past Crafts: Felt Flowers

Hello Dear Readers,
I'm sorry that it's been an entire week since I have last posted, but it has been a busy week! Anyways, If you hadn't already noticed, I really really enjoy felt. As a result, I make a lot of crafts with felt. I'm not much of girly girl, therefore I don't usually like flowers. BUT! When flowers are made of felt, I love them. 
I found the idea for these flowers in a crafting book somewhere- except the book used leather for the petals. Anyways, my friend Kelsey and I took a stab at them. Kelseys were really cute but I don't have a picture of them :(. This is what mine turned out like:


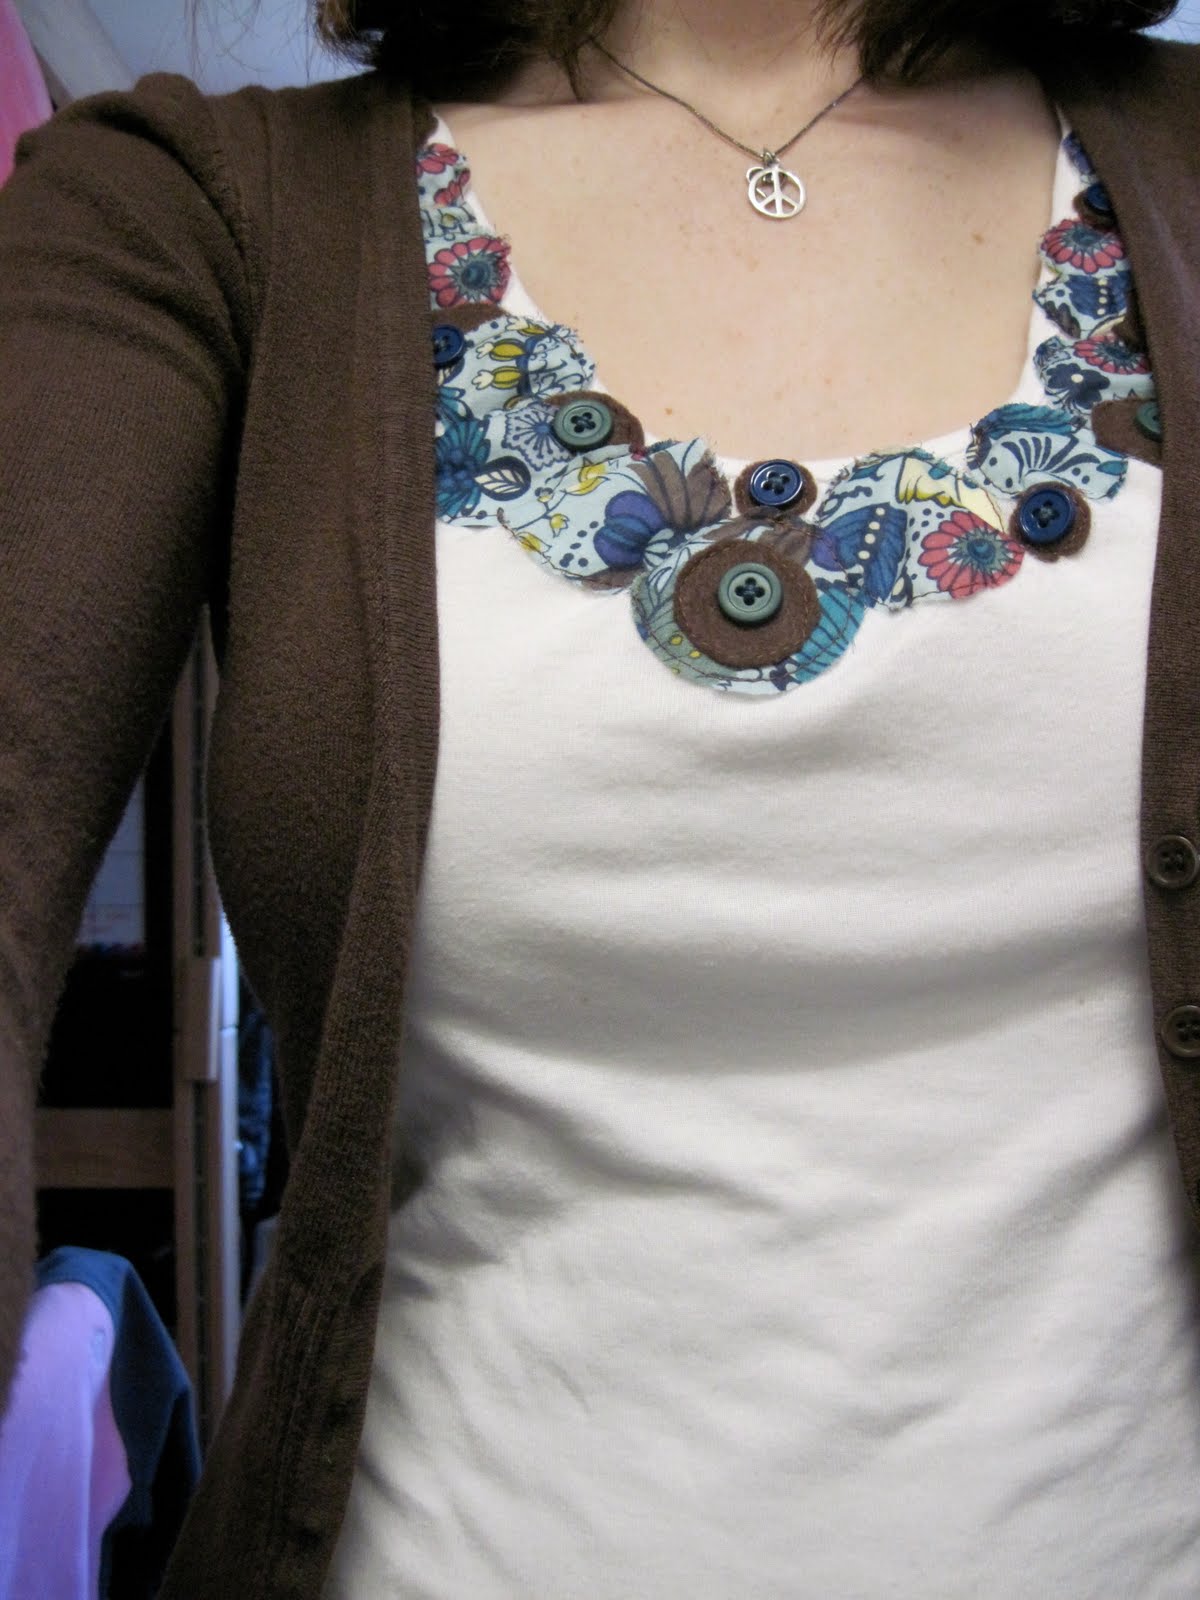
I was shopping at old navy one day and I saw these adorable sweaters with fabric flowers on them. Yes, they were cute, but no, I did not have the money to spend 30 dollars on one. So, I came home, and I crafted up some felt flowers that I can attach to my sweaters that I already own!


I want to make more and use different colors of felt or even some regular fabric. But I haven't gotten around to it yet. 
Besides these flowers looking cute on sweaters, I discovered that they are versatile and look cute in hair, as well! Take a look:


I should be crafting a lot this next week because it's finals week and that means I'll be needing some procrastination. So hopefully, I will be posting again soon. 
E

Thursday, April 22, 2010

Happy Earth Day!

In honor of Earth Day (yay!) I'm going to show you some crafts that I have done in the past with (mostly) recycled stuff! I'm not saying these are actual recycled products, but rather they have been recycled within my craft collection. I generally do these crafts when I'm looking for a challenge. The challenge is to make a craft without spending any extra money on it (aka not having to buy anything SPECIFICALLY for that craft). Enjoy!


These first three items are slightly strange, but oh well. My roommate and I painted some letters earlier this year and hung them up on the wall as a quote. The letters we had left were D, L, U, G, and F. My roommate was going to throw them away but I told her maybe I would do something with them later. 
Anyways, I contemplated forever, but decided on finding a word that started with the letter (D is for darling, etc) and find a coordinating picture to go with the word. Here are three of the five letters that I decorated:


D is for darling. Darling is what my parents are. This is a picture of them on their honeymoon. My siblings and I are sending them back this summer and we can't wait! 


U is for unique. Unique is what my friend, Kelsey and I are. We are unique people and we have a unique friendship. It's fabulous.


L is for laugh. Laughing is one my favorite things to do. This is a picture of my sister and I. 

This next craft is a little difficult to read, but oh well. I found this greeting card at a store and I absolutely loved the saying. So instead of buying the card, I wrote it down. Later, I realized I had this lid from a bowl sitting around that I wasn't using. So, I decided to paint it, cut out some magazine letters, and make it into wall art.


"Life isn't about finding yourself, life is about creating yourself."

This next project may be one of my favorites. I found some crafting book a while back that gave me the idea to make a clock. I was DETERMINED to make this clock without spending any extra money and I did. I took apart and old clock that I had (which was now collecting dust under my bed), and I found a cardboard hat box sitting around at work that I snatched (they were going to throw them away). Next, I cut apart the box, and painted it. I scrummaged through my house to find items to use for the numbers and this is what I came up with:


Thats all for now! Happy crafting AND earth day!
e

Saturday, April 17, 2010

Past Crafts: Picture Crafts

One of my favorite things in the entire world is pictures! I love to find new ways to display and craft with pictures. Here is a few crafts that I have done using pictures. 
This first project was for my dorm room. I decided that because my roommates and I were going to have a lot of wall space, we should do something fun to cover the walls. I decided on a picture/paper collage. We bought canvas', painted the sides, and mod podged pieces of paper and different pictures onto the canvas. We each made one with our own pictures. This is what they look like on the wall:


And this is mine, a little more up close. 

Next, my friend Kelsey and I saw this idea in a craft book. It's basically two pieces of plexi glass that we got at hobby lobby with pictures and paper, etc. smashed in between them. We held them together with binder clips for a casual look.


 This project hangs above my desk. I really enjoy looking at it. 

This next project isn't very impressive, but I like it for some reason. My friend Kelsey and I went to a music festival last July, and we found some pictures online of the crowd. As we were looking at the pictures of the crowds, we found ourselves! So I decided to make a frame out of the pictures. First, I just painted a super cheap frame purple. Next, I cut up the picture of the crowd into strips and mod podged them onto the frame. Where's Emily and Kelsey??? (Like "Where's Waldo?") 

I thought it was only appropriate to put a picture of Kelsey and I in the frame. 

Remember how I talked about cardmaking?? Well, these next projects go right along with card making and paper crafts! I found these stamps at Archievers last summer and I loved them. So, I found pictures that went well with the sayings and decided to make something up! 

This is a cut up photobooth of my boyfriend, Jeffrey, and me. The stamp reads "One can never have too many hugs or laugh too often."


And this one is another cut up photo booth of Kelsey and I. The stamp reads "Always carry laughter with you where ever you go."

Anyways, I make a lot of crafts with my pictures so I'm sure I'll be back to post more in the near future. 
Until then,
E

Monday, April 12, 2010

Past Crafts: Hair Pieces

I love doing fun things with my hair because I have some interesting hair that does not always look good. Therefore, I make up for it by wearing cute hair pieces. I can usually be pretty creative with these sorts of projects- I have used paper, fabric, paint, felt, buttons, etc. 

These first two are fabric covered. I have used this fabric on several different things...this shirt for example.

I made this one with paper- I just backed it with cardboard to make it stronger.

I LOVE dinosaurs. So I cut out a dino from some scrapbook paper I had and modpodged it onto paper, and painted the edges. 

I'm also mildly obsessed with buttons and felt. This is one of the first hair ties I made. 

Another colorful hair tie.

And lastly, a simple hair clip to jazz up my boring hair. 

Perhaps I will continue posting pictures of hair pieces I make in the future. But for now, happy crafting!

E


Sunday, April 11, 2010

Past Crafts: Shoes

These crafts that I'm discussing aren't THAT past...but they are past enough that I didn't have this blog when I made them.
I got the crazy idea one day to cover a pair of shoes in paper. This, however, was not a good idea. These shoes look good, but they are not practical. I made a pair with my friend Megan this past fall:


This is my friend Megan and I after we made them. We just mod-podged srapbooking paper onto normal flats. 
Mine are the blue ones with trains and bikes, etc. I liked the paper because it pictured all sorts of transportation, and I was making shoes...and shoes=walking and walking=another form of transportation. Anyways, I have only worn them once. Like I said, they are not very practical. 
But! This spring, my other friend Shannon gave me the idea to PAINT shoes! I really loved this idea. I had seen these shoes on someone that I really liked, but I didn't want to be a creeper and buy the same shoes. so instead, I painted some similar ones (that I like more, anyways). Here are the shoes that I saw on the girl:
and these are the shoes that I painted:


I was really pleased with how they turned out. I love the colors.

Anyways, after painting that pair, I had the urge to paint more. I went out and bought two pairs of plain white $7 shoes and painted them. The first pair is colorful and crazy, and the second pair is more intricate. I love them both. 


I tried to splatter paint them, but the paint was NOT a good consistency for that. Oh well.
Here is the second pair:


I really love this pair, even if they did take HOURS! 

More past crafts later.
E

Friday, April 9, 2010

I'm mildly obsessed...

...with crafting.
I can't go a day without thinking about the next craft that I'm going to do. 
Last weekend was Easter, and because my family isn't too big on Easter, I decided to spend my day attempting a craft that I have scared away from forever. 
Altering clothes.
Eeek! Altering...meaning sewing, changing, and possibly screwing up perfectly good clothes. I decided to give my hand at a tank top that I had already put in the goodwill pile, so it didn't matter. I wanted to jazz it up and take the sides in because it's a little large on me. It started as a very plain, white tank top, and this is what it looks like now:

I am really pleased with how it turned out. But I did learn a few things from this craft:
1) I'm terrible at sewing circles. I need practice. 
2) Never expect the project to turn out as planned
3) Altering a shirt comes with a really wonderful sense of accomplishment

After Easter weekend, I came back to school. And with school, comes procrastination. Crafting is my procrastination. This week, I tried my hand at knitting headbands, which I knew I could do because I know how to knit in straight lines and straight lines only. I did one thick and one thin headband:


These headbands were easy and fun.  I'm excited to explore more with knit headbands because they make a cute little accessory for the summer!
Until next time,
E